*New* Superhero Dad & Doll Greeting Cards


Today I shared a little peek on my Facebook / Instagram of a greeting card I'd designed recently...
There is also this version...
 The big surprise is when you open the card, you find this...!!
A full dress up outfit to make your card into a dress up paper doll, so you can dress up your Dad / Husband / Friend / Brother as a Superhero. The cards are available in 3 colours (teal, blue and grey) and fully customisable, so you can choose the skin and hair colours and the name on the front of the card (as well as whether you have the pants or dressed versions - I thought most people would want their dad fully clothed as opposed to in his pants!!)

If you'd like to buy this card, you can do so here in my notonthehighstreet.com shop (they will be available here on my website from tomorrow)

I'd love to know what you think!

Thank you for dropping by today
Sarah x

Freebie Friday! Easter Girls Digi Stamp Set

This weeks Freebie Friday is a whole set of Digi Stamps! (I got a bit carried away colouring in, lol)


This set contains 4 digitally coloured PNG digi stamps - I've called them Grace, Faith, Hope & Joy (good easter names don't you think!) and 2 Black and White digi stamps for you to colour in, one JPEG and one PNG. You can download this weeks freebie over on my flashy new website (whoop!) right here or on box.com here.

*** I'm going to be a bit cheeky again this week and ask, if you wouldn't mind terribly, in return can I just ask for the teeniest favour??? I've entered the 'Women in Making' competition this year and would love you to vote for me (it's just one click - or two if you have Facebook and Twitter - no form to fill out, nothing to register for and I'd be eternally grateful!) I know some of you may have voted last week but the voting system broke last weekend and all votes were lost (boo!) Please just click here to register your vote - thank you, thank you, thank you!! ***

I'd love to see what you make with your digi stamps - leave me your blog links in the comments if you'd like to share :o)

Thank you for dropping by today!
Sarah x

New Website Launch!


So excited to now share that the new website is LIVE! you can check it out here now, I'd love to know what you think!

Thank you for dropping by today
Sarah x

Website Update!


We told you we had lots of new things coming, and one project that we've been working very hard on for a while now is a brand new website!! I'm super pleased to say we got it finished enough to launch today (Lisa even very kindly left her sickbed to come and help me finalise everything today - she's a keeper!) so the website is down for a few hours right now as all the techie stuff switches over and then I'll be showing you around our brand new home - I can't wait!!

We still have a few tweaks to make and lots more products to be added (we started with bestsellers which are all on, we just have the last few bits and all the digi stuff to load on - that continues tonight!) Some products have been discontinued to make room for new ones coming soon, there isn't really enough to create a sale so we'll be creating more of our super popular bargainous grab bags with them - look out for more news of that soon!

Thank you for dropping by today!
Sarah x

Working From Home - My Tips!


One of my favourite parts of my job, is that I get to work from home! I have literally done everything possible to continue doing so, even when most (sane!) people would probably have hired an office about a year ago when things went crazy here. I have moved from a tiny corner of my living room, to the smallest bedroom, to the corner of my living room AND my smallest bedroom (and a bit of storage in my hallway) to the biggest room in the house (after a bit of persuasion - i.e. nagging B continually until he gave in, haha!) and some more storage in the hallway areas where I can. We occasionally spill over into the living room too when we have big orders to pack (like right now - we have about 40 boxes in there waiting to go!) We even have a plan for the next two stages of growth that we know are going to come next. Today I'm going to share with you how we've coped, how I stay motivated and how we changed things when I took on staff and other people had to come here to work too.
Make Space! One of the most important things is to create a designated work area - I'm lucky to have the room I do but even in a small space you can have a small workstation with your laptop, papers and anything else you need, even if you need to pack it up at the end of each day (if it's a kitchen or dining room table maybe) trust me this is totally worth it - working in bed on a laptop or having constant interruptions is not going to work! Getting to your 'office' each day will put you in the right frame of mind for work.
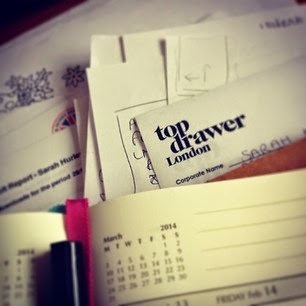
Get Organised - I'm a notebook and stationery obsessive! but out of all of the pretty notebooks I hoard, my essentials are my one notebook (it's actually the 4th one, I have 3 previous ones I've filled up all to hand) where I keep lists of all my goals, long term and short term, it contains everything I want to achieve in the next week / month / year / 5 years, it's regularly updated and things change along the way but it's like a road map of where I'm going and I'd be lost without it! I also have my diary full of what needs to be done each day and overall in the week, it often gets overrun with notes, addresses, things to remember, calls to make, events and meetings, stock to reorder and anything else! I transfer things out of this onto my assistant Lisa's schedule where I can, we have a whiteboard in the office where we write the weekly goals and things to organise and I make a list for B each day too. I create schedules for my team and we all do our bit to keep to them / change them and communicate. All papers are filed as quickly as possible into magazine files and folders. Setting goals and staying on top of things are essential to motivation - quite often when I find myself sitting staring into the distance wondering what on earth I need to do next it's because in the midst of the craziness this system has slipped. A quick tidy up and update of everything normally gets us all back on track!
Dress for the job you want - of course I have days when I'm rushed off my feet, I'm tired and I'm very aware that I don't need to leave the house, so do I work in my Pyjamas? sometimes... However! I have separate work PJ's that I only wear for work. This still gives me the feeling of getting up and dressing for work, it gets me out of the "home" frame of mind and into "work"
Make a routine - having a set morning routine will help you stay on track - whatever your morning routine is whether its walking the dog, making coffee, checking your email etc etc... get in the habit of doing it every day, then you know, once the dog has been walked, the coffee is made and the computer is on it's work time, stay in the zone, don't call a friend, don't put the washing on, don't quickly hoover up, don't put the TV on - you're at work, it's time to get to business!
Stay inspired - set aside at least an hour or two a week to gather inspiration from Pinterest or trade  magazines, brainstorm with your team or go over your goals and plans - it will keep you excited about what's to come, motivated and on track to achieve your goals!
Take a Break - it's easy to get caught up and just keep going, I know, I do it all the time! but take 10 or 15 minutes in the middle of your day to have a cup of tea, some lunch or a walk round the block - a break will do you the power of good! If you struggle with this ask someone to remind you by bringing you a cup of tea or sett a reminder on your phone for a certain time.
Get out! it's so important when you work from home not to cut yourself off, network, socialise with colleagues and attend trade shows and events - it's important to keep up to date whatever your industry is. Meeting people face to face every now and then will keep you up to date with things and keep you from becoming a paranoid hermit!
Growing your Team - taking on someone to work in your business is scary enough, also inviting them into your home and family is even more nail biting! But remember, it's the same for them, not only is it their first day in a new job, they are spending it in a strangers home. Be professional, make space for them, ensure facilities are easily accessible (so they can make tea and go to the bathroom without having to ask etc...) and set an example - sitting on the sofa watching breakfast TV and eating your cornflakes behind them will not inspire them to work hard for you! Show that you mean business and are taking your work seriously and they will too. (I'll be talking more about growing your team in a separate post soon!) When we took on Lisa, we changed the office to be entirely in the big room with storage outside, this gave us a designated space so that we could all work together comfortably rather than being spread out in different rooms. I think this has been absolutely essential as Lisa has, from day one, seen how the whole company works, everything that I do and how its done and has been able to pick up everything easily.
Last but not least - break all the rules!! only once in a while though! - this is very important, if you've been working very hard and can't remember what a weekend looks like, it might be time to break the rules a little, this past Saturday I was working through a pile of spreadsheets, not the most fun thing in the world! so I watched Sabrina in the background :o) This is an exception rather than a rule, but every once in a while, it's fun to break the rules!

I'd love to know your working form home tips / routines - please leave me your links or stories in the comments.

Thank you for dropping by today
Sarah x

PaperCraft Inspirations Daffodil Cards


Today I'm sharing a set of cards and a  cute little basket that you may have seen recently in Papercraft Inspirations. My brief was to create something cheery and springlike with a focus on large 3D daffodils (eek!) Luckily Sizzix came to my rescue with their fabulous Daffodil die (you can find it here on the Sizzix UK website) here's what I came up with...
I used Distress Inks to create a cloud effect background, which I used on to the background and behind the windows (another Sizzix die) the grassy borders are cut by hand and the butterflies are from a Martha Stewart punch.
The white flowers are a Sizzix die I have used a lot, I'm not a fan of big flowers but these tiny ones they quite recently started to bring out are just fabulous! I use Pinflair glue to assemble and add a touch of Stickles to the centres to hide any glue squidge (technical term!) and add a touch of sparkle.
I used an embossing tool to add texture to the petals before assembling and I actually cut down the centres by about half as they were a little bit *too* 3D for me and I wanted them to look more like the daffodils that grow in the forest near my home, they have smaller centres and bigger petals that the ones shown on the Sizzix packaging - the centres I feathered slightly with scissors to soften the look. The sentiments stamps used throughout are my own set available on my website)
The the bricks on this card were created from the discarded window panels from this die (I cut the arched top off of this one to create a square window)
I also used the embossing tool to add texture to the window frame...
I created a fancy easel card from two square card blanks for this card and added a flap to the top for the window - the sky background paper is also matted inside the window with the daffodils around the outside and on the stand up front panel. You can find step by step instructions for creating this card base here on the Papercraft Inspirations blog!
I needed a 3D project to finish this set off and immediately thought of this easter basket (the template can be found inside the magazine - it's still available as a back issue or to download on your iPad)
This could be used in an easter egg hunt, filled with mini eggs or treats as a gift or even as a table centrepiece!

I had lots of fun putting this set together, I hope you like it!

Thank you for dropping by today
Sarah x

Freebie Friday! Calendar Journaling Cards

Welcome to my very first Freebie Friday post!

This weeks freebie is this fab set of 3" x 4" calendar journaling cards, fab for Project Life or Documented365 or even just to use on your scrapbook pages and in your craft projects.
You can download your own printable set right here or click on the picture below.
*** If you wouldn't mind terribly, this week, in return can I just ask for the teeniest favour??? I've entered the 'Women in Making' competition this year and would love you to vote for me (it's just one click (or two if you have Facebook and Twitter), no form to fill out, nothing to register for and I'd be eternally grateful!) Please just click here to register your vote - thank you!! ***

I'd love to see what you make with your cards - leave me your blog links in the comments if you'd like to share :o)

Thank you for dropping by today!
Sarah x

Vintage Style Photo Canvas DIY


Today I'm sharing how I made some fun and easy photo canvases...

What you will need...

A stretched and primed canvas (available from good art & craft shops) I used a 5" x 7" canvas board
Gel Medium (I used Golden regular gloss gel)
A big paintbrush (to apply the medium smoothly, a 1" brush was the perfect size for my canvas)
A laser print out or copy of your photo (ensure that it is a toner based printer or copier, available in most offices / libraries etc...)

To make...

If your photo is on your computer, start by flipping it over (the picture will come out backwards otherwise, this may not matter for a lot of pictures but anything with words etc... will look a bit strange) print onto a laser printer or copy with a photocopier - I made my picture black and white as we have a black and white laser printer here in the office (our colour ones are inkjet)

Prepare a surface to work on - you may want to use a craft sheet if you have one - and begin by painting your canvas with a thick layer of gel medium all over
Place your picture face down on top of the canvas and gently smooth out any air bubbles, pressing it  down into the medium
Leave to dry for a few hours (overnight preferably) and once dry spray the canvas with water
Using your fingers, rub gently to remove the paper - you should start to see your image revealed! don't rub too hard or you could damage your image (some bits will come off anyway) and keep spritzing with water as you go
Once your image is revealed, leave the canvas to dry for about 20 minutes - if your image goes cloudy, like this...
then you aren't done yet! the cloudiness is caused by small paper fibres left behind, so spritz once more and rub gently to get them all off, it may take a couple of tries to get your image perfectly clear...
Once you have finished, apply another coat of gel medium and leave to dry. It's as simple as that!

Here are the two I made...
One of Fuzzybutt (of course!) and one of mine and my sisters wonderful (ahem! it was the 90's be kind!) fashion choices. I love that they aren't perfect and have that vintage slightly worn around the edges look to them, they look great in my little photo corner :o)

I hope you'll give them a go :o)

Thank you for dropping by today!
Sarah x

Kickstarter Project Update! (or how failure led to success...)


You may remember a few weeks ago we tried our hand at our first Kickstarter Project to try and raise money for a badge maker machine. Sadly, despite some support (which we were super grateful for - thank you!!) we didn't hit our target (boo!)

BUT! the story didn't end there...

One of our lovely backers contacted us after the project ended, they had found a slightly used Badge Maker machine (the exact model we wanted!!) on a well known auction site and offered to give us the money to pay for it, in return for just a tiny favour - of course we said YES! and a week later we were the proud owners of a shiny new Badge Maker - yay!

It's taken a while for us to get used to it, but today the first perfect samples were made...
B has definitely mastered it now and is hard at work making up the new product ranges for release in the next week or two - we can't wait to share them with you!

We were super lucky and very thankful to have been given a second chance - we have since gone over our Kickstarter project to examine why we think it didn't work and came up with a whole list of things to improve upon for next time, here is our advice if you are thinking of trying your own Kickstarter project...

* Take some time to really craft your pitch, we rushed ours a little bit in all the excitement and didn't get over our whole message as we would have wanted - we should have waited a few days and added more information about what we wanted to do and why and really showed our excitement for the project

* Add lots of pictures! we had just a couple and none of them really showed the end result, we should have re-shot things and mocked up examples of what we wanted to create

* Make a video! we didn't add one and I think that was a big factor - a video will convey your brand, personality and message much clearer and if you have a cute dog / cat / bunny on hand to make a little appearance, I guess that couldn't hurt either ;o)

* Give it a go! yes, you might fail, your first one might not work, your second one might not work!, you might be sad for a bit BUT you will still be a step further on than you were before, you will have learned what does and doesn't work, you'll really look at the successful pitches running at the same time and you may even be lucky enough to meet some fab people through your backers as we did - Kickstarter is a brilliant platform for raising investment and getting involved and backing other projects too (it's a lovely feeling to have helped get something started, even in just a small way!)

I hope these little tips help you, we have our fingers crossed we will make it when we decide to give it another go - everything that doesn't work out quite how you would like it is a learning opportunity and although we were sad at the time, we've learnt a lot from the experience and, of course, achieved what we wanted in the end too!

Thank you for dropping by today!
Sarah x

Daily Stories Scrapbooking with Teresa Collins


Today I'm sharing a scrapbook page made with the 'Daily Stories' collection from Teresa Collins...
You may have noticed, I've not used Teresa Collins products much here, and to be honest, although I think her designs are really beautiful, I very rarely buy them as I always feel they are too 'grown up' for me, I like a touch of whimsy to my work whether I'm drawing or crafting or anything really! However when I saw this collection, I loved the colours, the gorgeous textured papers, the fun and more whimsical patterns and the great sayings and embellishments throughout so I had to pick up the whole collection! (Pretty crazy to go from having pretty much nothing to buying EVERYTHING, right? thats just how I roll... ;o) )
I loved cutting apart the scallops and using them to layer, the butterflies I added in a strip down the middle using some gold and white twine from Stampin up to create their 'flight path' and of course, no layout of mine would be complete at the moment without enamel dots!
Here is a close up of the pic - two of my little sisters and I went to Claire's Accessories that day and were trying on these funny glasses - I had to get a pic - aren't they cute! lol, here are a couple of close ups...
 
 I used lots of the fun sayings from the papers to match the mood of the picture and cut apart the journaling card paper to get the 'Never Forget This Day' card - although it was a just a silly trip not a major life event, I never will because we had such fun on our little impromptu jaunt! :o)

Ooooh, and I have lots of this collection left for another layout - yay!

Thank you for dropping by today
Sarah x