Firstly, my apologies, this post should have happened yesterday, but unfortunately all my plans of catching up and maybe even getting ahead this weekend were completely shot to pieces and I fell ill *sigh* luckily I am fighting fit and back to work today (yay!)
So, today, I want to go over one of the things I spoke about on one of my recent Create & Craft shows - colouring die cuts with your Promarkers. Usually we would die cut out pieces from multiple colours of card and build them up etc... however, it can be difficult to plan ahead and it leaves you with lots of scraps of card - which, if you're anything like me, you have great intentions of using up on another project and then promptly stuff in a drawer and forget about (sound familiar? lol) so what I started doing was cutting all of my die cuts from white bleedproof card and colouring with my Promarkers, here is an example...
The castle, dragon and clouds are all cut from the same white bleedproof card using my Cricut Mini, the Cricut cartridge for the castle and dragon is called Fantasy - I can't remember which one the cloud was from but you can search within the software to find it and download it - easy peasy! Each die cut piece was coloured with Promarkers before being layered together with Pinflair (I blame Phill for my addiction to Pinflair now! lol) Here are a couple of close ups, you can see just how 3D those die cuts are! (you can click to make them bigger)
I glittered the clouds with Stickles and then pieced together my card - the papers are from two DCWV stacks - the blue is from everyday essentials, my new fave! before stamping the coach and horses at the bottom.
I hope my little tip saves you some time and precious pieces of card and paper!
Thank you for popping by today
Sarah x
Showing posts with label Provocraft. Show all posts
Washi Tape Love
The last few weeks I've become slightly obssessed with Washi Tape - between my lovely Rico stash and some that I've been tempted by from the girls on the Facebook Smash Book group I've built up quite a collection! I've been using it in my books and journals but hadn't been brave enough to use it in my Scrapbooking, until now!
It was great to use as an accent in place of ribbon or banners as I did here.
This layout kind of put itself together, it didn't seem like work, from the vintagey style Instagram pic of Fuzzybutt, the muted tones and the perfectly coordinating tape, it just flowed, and I so enjoyed making it, I even used a bit of my treasured Basic Grey Basics paper which I very rarely use as I love it so so much and dread running out of it!
I cut the Hexagons with my Cricut using the Princess Cartridge (its the background for one of the alphabets on there) and added some buttons and twine.
It was great to get a bit of crafty time over the weekend, in amongst a bit of work, catching up with friends, baking a ham (more about that another day!) and doing some writing, so fun!
I also found out today that something I've been working really hard on and keeping super secret will be launching one month today on the 28th June - I'm beyond excited and can't wait to share!
Now I must get back, I promised to cook B dinner tonight and if I don't make a start soon it will be beans on toast! LOL
Thanks for popping by
Sarah x
Supply List - Bazzill Basics Cardstock - Cream Puff & Almond Cream, Basic Grey Basics white 6x6 paper pad, Coredinations Cosmo Cricket Cardstock, Woodgrain & Teal Stripe Washi tape - Angel Cards, Buttons & Market Street Alpha Stickers - October Afternoon, Glitter Alpha Stickers - Dovecraft, Cricut Expression & Princess Cartridge - Provocraft, Twine - The Twinery
It was great to use as an accent in place of ribbon or banners as I did here.
This layout kind of put itself together, it didn't seem like work, from the vintagey style Instagram pic of Fuzzybutt, the muted tones and the perfectly coordinating tape, it just flowed, and I so enjoyed making it, I even used a bit of my treasured Basic Grey Basics paper which I very rarely use as I love it so so much and dread running out of it!
I cut the Hexagons with my Cricut using the Princess Cartridge (its the background for one of the alphabets on there) and added some buttons and twine.
It was great to get a bit of crafty time over the weekend, in amongst a bit of work, catching up with friends, baking a ham (more about that another day!) and doing some writing, so fun!
I also found out today that something I've been working really hard on and keeping super secret will be launching one month today on the 28th June - I'm beyond excited and can't wait to share!
Now I must get back, I promised to cook B dinner tonight and if I don't make a start soon it will be beans on toast! LOL
Thanks for popping by
Sarah x
a Gorjuss 3D card...
Today I'm sharing a card I made over the weekend (I got time in my studio, yay!)...
I stamped Gorjuss girl stamp onto bleedproof card and coloured with Promarkers before layering with 3D foam for a dimensional look, I then added glitter to the butterflies and dragonfly and some glossy accents to the toadstools and finishing touches like her coat buttons.
I've never made one of these before but I love the effect, I think there may be one or two more coming soon!
This morning I finished up my magazine submissions and sent them over before a quick lunch, a phone meeting with a new client (more about that soon!) and then back to work on my illustrations for the Bologna Book Fair - today is my last day to finish them up - eeeeek!
Thanks for dropping by today.
Sarah x
and a couple of close ups... (just click to make them bigger and see all the details)
I made the box frame from Kraft card, cutting an aperture in the middle. The cloudy background I made using watercolour paper and distress ink with a homemade template. The fence is cut from leftover kraft cardstock using my cricut and then run through my Cuttlebug with a woodgrain embossing folder, I then stained it with tea dye and walnut stain distress ink, adding gold screws with a metallic pen.I stamped Gorjuss girl stamp onto bleedproof card and coloured with Promarkers before layering with 3D foam for a dimensional look, I then added glitter to the butterflies and dragonfly and some glossy accents to the toadstools and finishing touches like her coat buttons.
I've never made one of these before but I love the effect, I think there may be one or two more coming soon!
This morning I finished up my magazine submissions and sent them over before a quick lunch, a phone meeting with a new client (more about that soon!) and then back to work on my illustrations for the Bologna Book Fair - today is my last day to finish them up - eeeeek!
Thanks for dropping by today.
Sarah x
Inspired by... Hexagons
One of the recent trends I LOVE and have even incorporated into my own product ranges is honeycomb / hexagons, I may be a little bit obsessed! I've been hunting high and low for a hexagon shaped punch but haven't found one *sob* but then last night while messing about with my Cricut I found on my 'Once Upon a Princess' cartridge some Hexagons - yay! It didn't matter that it was around 2am and my cricut is a bit noisy I had to cut them out right then (sorry neighbours! - actually I take that back, one of my neighbours has drums *sigh*)
I then stayed up into the wee small hours to put together this layout...
I cut my hexagons out of some old book pages from a french book I thrifted ages ago, and some scraps of Studio Calico and Amy Tangerine paper. Once I worked out my pattern I glued down my pictured and then added all my hexagons. As a finishing touch I stitched over some of them with brown embroidery thread.
here are a couple of close ups... (click to see them bigger!)
It was great to get back to crafting after a week or so of being too busy to get in my studio - I ended up making (or at least starting!) lots of projects. Today I was back to book research, product design and catching up on tons of emails after my email broke this morning! Lots of cups of Earl Grey have kept me going though and I think I might even make it back into my studio tomorrow night :o)
Thanks so much for dropping by
Sarah x
I then stayed up into the wee small hours to put together this layout...
I cut my hexagons out of some old book pages from a french book I thrifted ages ago, and some scraps of Studio Calico and Amy Tangerine paper. Once I worked out my pattern I glued down my pictured and then added all my hexagons. As a finishing touch I stitched over some of them with brown embroidery thread.
here are a couple of close ups... (click to see them bigger!)
It was great to get back to crafting after a week or so of being too busy to get in my studio - I ended up making (or at least starting!) lots of projects. Today I was back to book research, product design and catching up on tons of emails after my email broke this morning! Lots of cups of Earl Grey have kept me going though and I think I might even make it back into my studio tomorrow night :o)
Thanks so much for dropping by
Sarah x
Scrapbooking with my Cricut
Today I'm sharing a scrapbook page I made using my Cricut Expression - this was an idea I had a while ago and finally got round to last night - I loved making it :o)
First I cut a square of the Light Woodgrain paper approx 8" x 7.5" and stuck it to my cricut mat. I lined up 9 Hearts on the screen and autofilled them to the paper - it evenly spaces them and fits them to the page - a brilliant feature!! I then cut 3 smaller hearts from the darker woodgrain paper.
I backed four of the hearts with the bird paper from American Crafts - this was my last sheet, I need some more of this, fast! its such a great paper from a few collections back. I stuck my completed square to my Bazzill Card Stock. I hand stitched the darker hearts in the remaining gaps with embroidery floss. Lightly sanded the coredinations cardstock and added my instax picture. The frame I painted with cream acrylic paint before adhering on top.
As a finishing touch I added the butterflies from Studio Calico to the top corner, I stacked two of them and added a button and some twine. Then I used the woodgrain alpha's and my brown journaling pen for my title and journaling.
I love the fact that despite only using one small picture the rest of the layout doesn't detract from it, the focus is all on her (my little sister)
I can't wait to try some more experiments with the autofill to see what other effects I can make on my layouts!
Thanks for dropping by today :o)
Sarah x
Supply List - Once upon a Princess cartridge, Woodgrain Paper (light - Dream Street, dark - Crate Paper, textured - Coredinations) Cream bazzill Cardstock, Studio Calico Chipboard Butterflies, Miscellany Frame & Woodgrain Alpha Stickers - October Afternoon, Bird Paper - American Crafts, Twine, Acrylic Paint, Brown Journaling Pen, embroidery floss, Instax Picture
First I cut a square of the Light Woodgrain paper approx 8" x 7.5" and stuck it to my cricut mat. I lined up 9 Hearts on the screen and autofilled them to the paper - it evenly spaces them and fits them to the page - a brilliant feature!! I then cut 3 smaller hearts from the darker woodgrain paper.
I backed four of the hearts with the bird paper from American Crafts - this was my last sheet, I need some more of this, fast! its such a great paper from a few collections back. I stuck my completed square to my Bazzill Card Stock. I hand stitched the darker hearts in the remaining gaps with embroidery floss. Lightly sanded the coredinations cardstock and added my instax picture. The frame I painted with cream acrylic paint before adhering on top.
As a finishing touch I added the butterflies from Studio Calico to the top corner, I stacked two of them and added a button and some twine. Then I used the woodgrain alpha's and my brown journaling pen for my title and journaling.
I love the fact that despite only using one small picture the rest of the layout doesn't detract from it, the focus is all on her (my little sister)
I can't wait to try some more experiments with the autofill to see what other effects I can make on my layouts!
Thanks for dropping by today :o)
Sarah x
A Cricut Nativity!
One of my favourite projects this Christmas season has been my Nativity scene frame that now sits in pride of place on my mantlepiece - I know this will be a feature of my Christmas decorations for years to come!
This was really simple to make, all the pieces you can die cut from your Cricut Expression (on to white and colour in like I did or using up your scraps!)
Firstly I sanded the frame and painted with two coats of acrylic paint - I made the paint quite watery as I didn't want a completely even finish, I like the Shabby Chic look!
I then set that aside to dry and covered the back part of the frame in snowfall paper from the Tinseltown CD, I cut the hills from a scrap of brown card and added those in front. I then die cut all the pieces from the cartridge (I cut most of these around 2.8 but depending on the size of your frame you may want to change this - the squares on the mat will help you see what size you should be cutting, it makes it so simple!) I cut everything from white card then coloured with my Promarkers.
Once the shapes were all dry I layered them together using Sticky Dots (they are great for sticking down the fiddly little parts of die cuts!) and added features using an American Crafts precision pen in brown.
I then arranged them onto the backing to get the look I wanted. Once I was happy I glued them all into place and tucked the back back inside the frame. I then added the Christmas Trees and the Angel to the frame. I used Stickles to make the Angels cloud and wings sparkly and to add baubles to the Christmas Tree. I then printed the banner and added to the top - done! Such a fun project :o)
I hope your Christmas preparations are coming along nicely, not long to go - eeeeeeek!
Sarah x
Supply List - Cricut Expression 'Winter Frolic' Cartridge - Provocraft, Tinseltown CD - Sarah Hurley, Frame (from any homeware store), White Acrylic Paint, Promarkers - Letraset, Precision Pen - American Crafts, Distress Stickles (Broken China), Stickles - Stardust - Ranger, Coated Card - Rymans, Sticky Dots
This was really simple to make, all the pieces you can die cut from your Cricut Expression (on to white and colour in like I did or using up your scraps!)
Firstly I sanded the frame and painted with two coats of acrylic paint - I made the paint quite watery as I didn't want a completely even finish, I like the Shabby Chic look!
I then set that aside to dry and covered the back part of the frame in snowfall paper from the Tinseltown CD, I cut the hills from a scrap of brown card and added those in front. I then die cut all the pieces from the cartridge (I cut most of these around 2.8 but depending on the size of your frame you may want to change this - the squares on the mat will help you see what size you should be cutting, it makes it so simple!) I cut everything from white card then coloured with my Promarkers.
Once the shapes were all dry I layered them together using Sticky Dots (they are great for sticking down the fiddly little parts of die cuts!) and added features using an American Crafts precision pen in brown.
I then arranged them onto the backing to get the look I wanted. Once I was happy I glued them all into place and tucked the back back inside the frame. I then added the Christmas Trees and the Angel to the frame. I used Stickles to make the Angels cloud and wings sparkly and to add baubles to the Christmas Tree. I then printed the banner and added to the top - done! Such a fun project :o)
I hope your Christmas preparations are coming along nicely, not long to go - eeeeeeek!
Sarah x
A Gorjuss Wintery Birthday Card
Yesterday was my MIL's Birthday and I wanted to make her a cute card as I wasn't able to see her in person due to my crazy schedule! I recently got hold of these Gorjuss girl stamps and I just knew she would love them so out came the Promarkers!...
Here are some close ups of the colouring and the 3D butterflies (these are from the same stamp set I just secured the middle only with a glue dot so the wings could 'flap' The shaped piece of card I stamped onto was cut using my Cricut Expression, these shapes come on the built in cartridge and are great for stamped images, I've cut a ton of them out of my Promarker paper (I use Rymans coated cardstock) while I've been working this week!
I hope she had a lovely birthday (B did pop round earlier and give her her pressies!) I'll have to ring her tomorrow (see if there is any birthday cake left ;o) hahaha)
Today I have been to London, and I'm still working like a crazy person on my deadlines, it's so exciting to see it all come together! I can't wait to start with the sneak peeks :o) Coffee and chocolate is seeing me through nicely, only now I've eaten the Christmas Matchmakers and the replacement Christmas Matchmakers (ooops!) I'll have to get B to hide the replacement replacement Matchmakers... it's not my fault, they're too delish!
Sarah x
Supply List - Background papers - Echo Park, Stamped Image - Gorjuss, Promarkers - Letraset, Glitter Star & Gem - Paper Cellar, Wink of Stella Pens - Kuretake, Sticker - October Afternoon, Distress Inks, Blending Tool, 3D foam, Glue dots, double sided tape, Shaped Bleedproof cardstock cut with Cricut Expression
Here are some close ups of the colouring and the 3D butterflies (these are from the same stamp set I just secured the middle only with a glue dot so the wings could 'flap' The shaped piece of card I stamped onto was cut using my Cricut Expression, these shapes come on the built in cartridge and are great for stamped images, I've cut a ton of them out of my Promarker paper (I use Rymans coated cardstock) while I've been working this week!
Here you can see the subtle shimmer from the Wink of Stella pens, I really love these pens for adding highlights to my colouring, you can use them over promarkers and colouring pencils to add highlights.
I love the paper ribbon detail and I'm loving the glitter stars, I think
they are on nearly every single project I've made this past week! I hope she had a lovely birthday (B did pop round earlier and give her her pressies!) I'll have to ring her tomorrow (see if there is any birthday cake left ;o) hahaha)
Today I have been to London, and I'm still working like a crazy person on my deadlines, it's so exciting to see it all come together! I can't wait to start with the sneak peeks :o) Coffee and chocolate is seeing me through nicely, only now I've eaten the Christmas Matchmakers and the replacement Christmas Matchmakers (ooops!) I'll have to get B to hide the replacement replacement Matchmakers... it's not my fault, they're too delish!
Sarah x
Basically Bare Cards
Today I'm sharing the two cards I've made for Basically Bare this week...
Supply List – Chipboard Heart & Wings – Basically Bare, Felt Frame – Basically Bare, Pearl & Snowcap Paint Dabbers, Glossy Accents – Ranger, Basics Paper – Basic Grey, Tinsel Ribbon – MME, Seam Binding – Crafty Ribbons, Glitter Star – Paper Cellar, Rub-on, Corner Rounder Punch, Double Sided Tape and Extra Strong Tape from stash.
Supply List – Felt Bird Stackabellies and Canvas Banner – Basically Bare, Rubber Stamp – LOTV, Papers, Postcard Embellishment & Greeting – Tinseltown Craft CD by Sarah Hurley, Tea Dye Distress Ink, Icicle Stickles – Ranger, Cricut Expression with Built in Cartridge – Provocraft, Promarkers & Flexmarkers – Letraset, Black Memento Ink Pad, Card Blank, Double Sided Tape, Bleedproof paper & Adhesive Pearl from Stash
For more details and lots more pictures and close-ups please pop over to the Basically Bare blog and take a look!
Sarah x
Supply List – Chipboard Heart & Wings – Basically Bare, Felt Frame – Basically Bare, Pearl & Snowcap Paint Dabbers, Glossy Accents – Ranger, Basics Paper – Basic Grey, Tinsel Ribbon – MME, Seam Binding – Crafty Ribbons, Glitter Star – Paper Cellar, Rub-on, Corner Rounder Punch, Double Sided Tape and Extra Strong Tape from stash.
Supply List – Felt Bird Stackabellies and Canvas Banner – Basically Bare, Rubber Stamp – LOTV, Papers, Postcard Embellishment & Greeting – Tinseltown Craft CD by Sarah Hurley, Tea Dye Distress Ink, Icicle Stickles – Ranger, Cricut Expression with Built in Cartridge – Provocraft, Promarkers & Flexmarkers – Letraset, Black Memento Ink Pad, Card Blank, Double Sided Tape, Bleedproof paper & Adhesive Pearl from Stash
Sarah x
Cricut Expression 2 - UK Launch!
The lovely peeps at Provocraft have asked me to share with you the info for the UK launch of the Cricut Expression 2 - so exciting! Jinger Adams is back in the UK to present this and you won't want to miss the shows!
The dates and times are as follows:
Tuesday 25th October
9pm & 11pm on Ideal World
Wednesday 26th October
8am & 10am on Ideal World
12 noon on Create & Craft
1pm on Ideal World
3pm on Create & Craft
4pm on Ideal World
5pm on Create & Craft
7pm on Ideal World
(Ideal World is Sky 644 | Freeview 22 | Virgin 747 | Freesat 812 and Create & Craft is Sky 671 | Freeview 36 | Freesat 813)
Sarah x
Gorjuss Girls & Promarkers
Today I'm sharing a card I actually made a few months ago for a TV show (it's been shown a few times, maybe you've spotted it? ;o) ) using the Gorjuss girl stamps (I love this set!) this was the first time I had used them and I loved them!
I coloured her in with my Promarkers (you might have to click on the pic to see the details) The paper is from My Minds Eye (I just bought some more of this, its gorgeous!) and I just added a greeting and some punched metallic card along with a greeting.
I'm so hoping to get some Promarker time this weekend, I haven't crafted since Sunday night, I've spent all week on designs for the new product ranges, revisions to my packaging designs and a fab secret project which I'll be launching soon with the help of my lovely Design Team - I actually can't believe it's Thursday today, the time has flown! But then it always does when you're having fun :o)
I'm now working on some projects for the launch of the Provocraft Cricut Expression 2 in the UK next week - exciting!
Sarah x
I coloured her in with my Promarkers (you might have to click on the pic to see the details) The paper is from My Minds Eye (I just bought some more of this, its gorgeous!) and I just added a greeting and some punched metallic card along with a greeting.
I'm so hoping to get some Promarker time this weekend, I haven't crafted since Sunday night, I've spent all week on designs for the new product ranges, revisions to my packaging designs and a fab secret project which I'll be launching soon with the help of my lovely Design Team - I actually can't believe it's Thursday today, the time has flown! But then it always does when you're having fun :o)
I'm now working on some projects for the launch of the Provocraft Cricut Expression 2 in the UK next week - exciting!
Sarah x
Autumnal Scrapbooking
With the change in seasons all the colours of the world around us seem to change, the blue of the sky gets a bit hazier and the leaves turn into yellows, oranges and reds, I literally see this change in front of my eyes as my desk looks out over the forest so every day it looks a little bit different, I love the changes through Autumn and Winter - they're my favourite seasons!
The Autumn colours are some of my most favourite colours and inspired this layout that I finished last night of my little sister Xena...
Thank you for all the lovely feedback on my Christmas Cards yesterday, for those of you who emailed me about buying different sized packs, I will be getting back to all of you later tonight! I've been spending today revising the packaging designs for my the big launch of my new craft ranges, as well as actually working on the designs for them (I can't wait to share everything thats coming!!) and getting things ready for my little blog and website makeover - such exciting but very busy times! :o)
Sarah x
The Autumn colours are some of my most favourite colours and inspired this layout that I finished last night of my little sister Xena...
The leaves were die-cut from my Cricut Expression (using the 'Preserves' Cartridge) on white paper and then coloured using Promarkers. I then embossed some of them in my Cricut to give them some texture.
The little envelope contains a hidden journaling card made from a scrap of October Afternoon cardstock...
The papers are Cosmo Cricket from quite a while ago, I've been saving them! I've also used a scrap of the Cosmo Cricket Coredinations which I LOVE - some of my favourite cardstock ever! and the embellishments are Cosmo Cricket and October Afternoon.Thank you for all the lovely feedback on my Christmas Cards yesterday, for those of you who emailed me about buying different sized packs, I will be getting back to all of you later tonight! I've been spending today revising the packaging designs for my the big launch of my new craft ranges, as well as actually working on the designs for them (I can't wait to share everything thats coming!!) and getting things ready for my little blog and website makeover - such exciting but very busy times! :o)
Sarah x
Catching Up!
Wow, what a crazy week and Friday already! I've barely had time to breathe, let alone blog so here I am catching you all up on my crazy goings-on!
Wednesday I met Emma at Selfridges in London for coffee and catching up (and maybe a teensy bit of shopping!) before coming home to about 3 million emails (as I was also out Tuesday afternoon) I'd had no Blackberry for 2 days (not only was the service down but my actual phone broke as well - not a good week for technology in the Hurley household, let me tell you!) but luckily Wednesday I came home to my replacement, bless Vodafone and their 24 hour replacement! So now I have a new and functioning Blackberry I feel like a normal person again (and I can tweet all my random stuff from wherever I am, yay!)
Thursday I had to tidy and organise my studio which look like a tornado at the very least had been through it, I also found a bunch of samples I hadn't yet photographed (more of that further down!) as well as sorting through the last few days deliveries of things to test / review / use / that I had bought on a whim at 3am while sleep deprived *sigh* then I got my schedule and emails up to date and organised.
Today I photographed the samples I found, here is one quick and simple card to share, using my cloud stamp (available from my website) then embossed with my Cuttlebug swiss dots embossing folder...
I love clouds (as you may have noticed) I always remember someone telling me that if you feel a bit blue just to step outside and look up at the sky, the clouds, the rooftops, it literally lifts your mood! (seriously, try it!)
After taking all the pics (not great unfortunately as the light is completely blocked out by the scaffolding all round my house!) I then made myself a giant mug of coffee and sat down with my sketchbook for a day of product planning, design and development, I also made lots of plans for upcoming projects and today has actually turned out to be a super productive day and I've got tons done - love it when that happens! and I've done all this through constant hammering and banging from 7.30 am right through to 4.30 pm every day (mostly on just 3 hours sleep) as I've had my roof redone (hence the scaffolding) my head is banging, I have the biggest set of eye luggage know to humankind BUT I'm pleased with my progress - yay!
Over the next few weeks you may notice a few little changes here on my blog as I introduce some features that I get asked for time and time again (I try to bring you what you ask for!) so I hope you will like the new and improved blog and I look forward to your feedback as ever :o) Next week I have some great features lined up including some Halloween projects with my Cricut Expression, some Christmassy things and my own solution to the almost impossible to find in the UK, Smash Book.
Have a fabulous weekend, and if you haven't already then pop over to the Challenge Blog where you may be able to win yourself some Derwent Coloursoft Pencils in a fabbo wooden box!
Sarah x
Wednesday I met Emma at Selfridges in London for coffee and catching up (and maybe a teensy bit of shopping!) before coming home to about 3 million emails (as I was also out Tuesday afternoon) I'd had no Blackberry for 2 days (not only was the service down but my actual phone broke as well - not a good week for technology in the Hurley household, let me tell you!) but luckily Wednesday I came home to my replacement, bless Vodafone and their 24 hour replacement! So now I have a new and functioning Blackberry I feel like a normal person again (and I can tweet all my random stuff from wherever I am, yay!)
Thursday I had to tidy and organise my studio which look like a tornado at the very least had been through it, I also found a bunch of samples I hadn't yet photographed (more of that further down!) as well as sorting through the last few days deliveries of things to test / review / use / that I had bought on a whim at 3am while sleep deprived *sigh* then I got my schedule and emails up to date and organised.
Today I photographed the samples I found, here is one quick and simple card to share, using my cloud stamp (available from my website) then embossed with my Cuttlebug swiss dots embossing folder...
I love clouds (as you may have noticed) I always remember someone telling me that if you feel a bit blue just to step outside and look up at the sky, the clouds, the rooftops, it literally lifts your mood! (seriously, try it!)
After taking all the pics (not great unfortunately as the light is completely blocked out by the scaffolding all round my house!) I then made myself a giant mug of coffee and sat down with my sketchbook for a day of product planning, design and development, I also made lots of plans for upcoming projects and today has actually turned out to be a super productive day and I've got tons done - love it when that happens! and I've done all this through constant hammering and banging from 7.30 am right through to 4.30 pm every day (mostly on just 3 hours sleep) as I've had my roof redone (hence the scaffolding) my head is banging, I have the biggest set of eye luggage know to humankind BUT I'm pleased with my progress - yay!
Over the next few weeks you may notice a few little changes here on my blog as I introduce some features that I get asked for time and time again (I try to bring you what you ask for!) so I hope you will like the new and improved blog and I look forward to your feedback as ever :o) Next week I have some great features lined up including some Halloween projects with my Cricut Expression, some Christmassy things and my own solution to the almost impossible to find in the UK, Smash Book.
Have a fabulous weekend, and if you haven't already then pop over to the Challenge Blog where you may be able to win yourself some Derwent Coloursoft Pencils in a fabbo wooden box!
Sarah x
Step into Christmas...
Today I'm sharing a Christmas card, it really is The Most Wonderful Time of the Year and I just love to make tons of projects, cards, anything I can really!
I used my Cuttlebug to make the embossed panel which I matted onto some gold card. The die cuts again are all done on white paper in my Cricut (Winter Woodland cartridge) and then coloured with my promarkers before layering onto the card with silicone glue.
It's a very simple make but I love the colours, I think I'll make a few of these as part of my big lot of Christmas cards this year.
Now for me it's a very Silent Night as I get on with proofing my Christmas CD before sending it off for production and to the Design Team tomorrow. Sneak Peeks and ordering info coming soon!!!
{ And I managed to fit 3 Christmas song titles into my post ;o) }
Sarah x
I used my Cuttlebug to make the embossed panel which I matted onto some gold card. The die cuts again are all done on white paper in my Cricut (Winter Woodland cartridge) and then coloured with my promarkers before layering onto the card with silicone glue.
It's a very simple make but I love the colours, I think I'll make a few of these as part of my big lot of Christmas cards this year.
Now for me it's a very Silent Night as I get on with proofing my Christmas CD before sending it off for production and to the Design Team tomorrow. Sneak Peeks and ordering info coming soon!!!
{ And I managed to fit 3 Christmas song titles into my post ;o) }
Sarah x
Detailed Die Cuts
Today I'm going to be talking about my Cricut Expression, I have always loved die cut shapes, since I first started crafting, in fact since I can first remember! One of the first toys I remember playing with was Fuzzy Felts, little die cut pieces of felt that you used to make scenes with, I remember making people, animals, farms, loads of stuff, they were my favourite thing EVER! and when I first started crafting and discovered paper piecing it brought it all back, I just love it.
I know loads of us feel the same way, we'd be lost without our die cutting machines! but I know some people feel that paper piecing die cuts can look a bit basic, so I wanted to share something that may make you look at your die cuts in a whole new way!
Die cutting is great for using up all your scraps and odds and ends of paper, but I cut around half of my die cuts out onto white bleedproof paper, this way I can colour them with my Promarkers and add as much detail as I like, it becomes as detailed as your stamped images...
So here is todays card, using the 'Winter Woodland' cartridge, the ice skates and the ice skater are cut out of bleedproof paper and coloured with Promarkers.
I hope my little card has inspired you to dig out your die cuts and try some new things with them! I'll have another die cut project for you later this week :o)
This week I am crazily working on my new ranges which you will start seeing in the next few weeks, I can't wait to share!
Sarah x
p.s. if you are looking for the Design Team call, it's two posts below...
I know loads of us feel the same way, we'd be lost without our die cutting machines! but I know some people feel that paper piecing die cuts can look a bit basic, so I wanted to share something that may make you look at your die cuts in a whole new way!
Die cutting is great for using up all your scraps and odds and ends of paper, but I cut around half of my die cuts out onto white bleedproof paper, this way I can colour them with my Promarkers and add as much detail as I like, it becomes as detailed as your stamped images...
So here is todays card, using the 'Winter Woodland' cartridge, the ice skates and the ice skater are cut out of bleedproof paper and coloured with Promarkers.
I hope my little card has inspired you to dig out your die cuts and try some new things with them! I'll have another die cut project for you later this week :o)
This week I am crazily working on my new ranges which you will start seeing in the next few weeks, I can't wait to share!
Sarah x
p.s. if you are looking for the Design Team call, it's two posts below...
An Altered Book
About a year ago I bought a papier mache book from Hobbycraft, I've been waiting for the perfect project for it and finally it came together with a chipboard house and some die cuts from my Cricut Expression...
Finally I run some gold paint over the birds and butterflies just using a fairly wet brush so the colour wasn't too strong and it was more of a glaze.
I think the back still needs a little something but I've not decided what just yet - maybe some journaling when I've made the mini book to go inside (like a book synopsis) but I'll keep you posted once I've decided!
Today I've been locked in my studio again all day working on crafty projects until I had no drying surfaces left! This evening I have some designs to work on and emails to catch up on!
Sarah x
First I covered the outside of the book with torn book pages using medium to stick it all down - I made sure to open the book half way through drying to ensure it could still open and that there was no cracking or bubbling of the paper. While that was drying I made the chipboard house and used a strong glue (Bostik) to glue it to the front of the book and painted it with a coat of white gesso.
When the medium was dry I run some fine sandpaper over so that the surface wasn't so shiny, then I sprayed it with my ink sprays in Midnight, Teal, Imperial Purple and Lipstick - I sprayed randomly and then used kitchen towel to blot and spread out the colour. When that was dry I painted the house in white and brown with acrylic paint and used gold acrylic paint for the side where the pages should be (the book reminded me of the old Readers Digest ones that my grandad used to collect - they all had gold edged pages - very fancy!)
I then cut shapes from the 'Heritage' expression cartridge for the fence (can you imagine trying to cut that by hand? eeek!), birds and trees and handcut the grass from a scrap of green bazzill. I cut the trees and braches from cream card and painted them to keep the hand painted look of the project consistent. It only took a few minutes to paint the leaves and trees. Once all the paint was dry I used glossy accents to attach all the die cut shapes.
Finally I run some gold paint over the birds and butterflies just using a fairly wet brush so the colour wasn't too strong and it was more of a glaze.
I think the back still needs a little something but I've not decided what just yet - maybe some journaling when I've made the mini book to go inside (like a book synopsis) but I'll keep you posted once I've decided!
Today I've been locked in my studio again all day working on crafty projects until I had no drying surfaces left! This evening I have some designs to work on and emails to catch up on!
Sarah x
Some More Cards!
Well, thank goodness it's about 10 degrees cooler here today and we've had a big thunderstorm, yay! I'm back in London on Thursday and I honestly don't think I could have survived it in that heat again, phew!
So, today I had a million emails to catch up on as well as some illustration work, which I'm still working on now, proposal sketches for a potential book project - it's very exciting and a bit nerve wracking, wondering if the project will go ahead, if I'll be picked, when will it happen etc etc... so fingers crossed!
I also want to share a few cards with you, I made lots and lots for my recent meetings and projects so I will share them as I get time to photograph them, here are the ones I done today...
A very quick 5 minute card using the Lite Four Legged Friends catridge for my Expression - I wanted to test some of the cuts on this cartridge and this chihuahua just stood out - he's so cute I had to make him into a quick card - this took less than 5 minutes and was all cut from scraps!
It's always good to have a few 'less than 15 minute' card ideas to hand for those moments where you forget a birthday or occassion - B always always tells me at the last minute before we are going somewhere so I have to make something in 5 minutes while I'm running a bath and finding a dress to wear!
I also have this little pile of lovelies waiting for me in my studio - I feel some late night crafting coming on - I'm working on an altered book project and I can't wait to finish it, waiting for the paints / inks etc... to dry in between stages is soooo frustrating! LOL
Speaking of dresses I have a few vintage beauties waiting for me on eBay so I better go and check my bids before I get back to the drawing!
Sarah x
So, today I had a million emails to catch up on as well as some illustration work, which I'm still working on now, proposal sketches for a potential book project - it's very exciting and a bit nerve wracking, wondering if the project will go ahead, if I'll be picked, when will it happen etc etc... so fingers crossed!
I also want to share a few cards with you, I made lots and lots for my recent meetings and projects so I will share them as I get time to photograph them, here are the ones I done today...
A very quick 5 minute card using the Lite Four Legged Friends catridge for my Expression - I wanted to test some of the cuts on this cartridge and this chihuahua just stood out - he's so cute I had to make him into a quick card - this took less than 5 minutes and was all cut from scraps!
And this one is using my Woodland Whimsies stamps coloured in with Promarkers. The branch I cut from kraft card, again this was super quick, probably about 10-15 minutes with the colouring in.
It's always good to have a few 'less than 15 minute' card ideas to hand for those moments where you forget a birthday or occassion - B always always tells me at the last minute before we are going somewhere so I have to make something in 5 minutes while I'm running a bath and finding a dress to wear!
I also have this little pile of lovelies waiting for me in my studio - I feel some late night crafting coming on - I'm working on an altered book project and I can't wait to finish it, waiting for the paints / inks etc... to dry in between stages is soooo frustrating! LOL
Speaking of dresses I have a few vintage beauties waiting for me on eBay so I better go and check my bids before I get back to the drawing!
Sarah x
Tips for Selling Your Cards!
One othe things I get asked a lot about is how to go about selling your handmade cards, so over the weekend I put together my 10 top tips for selling your cards, you can see them here on my Facebook Page. I will be doing some more of these articles regarding questions I get asked a lot, so if you have any special requests just let me know!
The card above I made today, with Crate Paper and Girls Paperie goodies. I took a couple of hours out to go and craft, I had a headache (silly me for having toast after a week of no carbs, ick!) and I was feeling grumpy so I took some time out, sometimes it's more productive to have a break! I also cut out lots of things with my Cricut for later (it's a bit noisy to use at night with OH trying to sleep next door!) I have lots of ideas already and can't wait to get started!
It was back into snuggly PJ's and fluffy booties today as it was cold and rainy (not that I'm complaining, much better than the icky heat!) I always feel more productive in the cold :o)
Now, I must get on, I'm finalising the last few things for a product launch this week - can't wait to show you more!
Sarah x
p.s. if you're looking for the Punky Scraps blog hop please see the post below!
More Provocraft Loveliness!
I mentioned yesterday that I learned to do the auto-fill on my Expression 2, so I thought I would cut out a whole bunch of doilies as they are great for so many projects - the aim being of course to have lots ready for different projects but I couldn't resist and used them all up on one project!
So here is my doily filled layout!
The doilies were cut from one of the built in cartridges in different sizes, I used them to make a random pattern on plain cardstock. The ribbon and ticket is from Pink Paislee. Chipboard is from Cosmo Cricket, the Alphabet is from Making Memories.
I love this pic of Fuzzybutt in my studio, she loves to come and lay in there while I work and she loves ribbon, she's always trying to run off with it if I drop a piece, I think if she was a real little girl she would definitely be a crafter!
And today, the lovely Fedex man came (I like him better than the postman because he only ever brings good post!) he had two big boxes for me....
You know I'll be busy later!!
Sarah x
So here is my doily filled layout!
The doilies were cut from one of the built in cartridges in different sizes, I used them to make a random pattern on plain cardstock. The ribbon and ticket is from Pink Paislee. Chipboard is from Cosmo Cricket, the Alphabet is from Making Memories.
I love this pic of Fuzzybutt in my studio, she loves to come and lay in there while I work and she loves ribbon, she's always trying to run off with it if I drop a piece, I think if she was a real little girl she would definitely be a crafter!
And today, the lovely Fedex man came (I like him better than the postman because he only ever brings good post!) he had two big boxes for me....
You know I'll be busy later!!
Sarah x
My First Cricut Card
Lots more crafting last night (and early hours of the morning, totally lost track of time! I've started re-watching Desperate Housewives from the beginning while I craft and I get so lost in it that it was 4am before I noticed yesterday!) and again today, OH went to do some bits for my MIL so I thought I'd have some time with my Cricut and learn some more about it. I think I'm getting there!
Today I made my first card from all of my cricut parts - I was learning how to make the internal shapes line up properly - it's very easy when you get the hang of it, if I can do it, anyone can! :o)
The shapes are from the pre-loaded Cosmo Cricket cartridge, my favourite one! I also learned how to do auto-fill so you can cut out a whole sheet of shapes - I'll show you the project with that in the next few days!
Thank you for the lovely comments on yesterdays free download and hello to my new followers and Facebook friends!
Sarah x
Today I made my first card from all of my cricut parts - I was learning how to make the internal shapes line up properly - it's very easy when you get the hang of it, if I can do it, anyone can! :o)
The shapes are from the pre-loaded Cosmo Cricket cartridge, my favourite one! I also learned how to do auto-fill so you can cut out a whole sheet of shapes - I'll show you the project with that in the next few days!
Thank you for the lovely comments on yesterdays free download and hello to my new followers and Facebook friends!
Sarah x
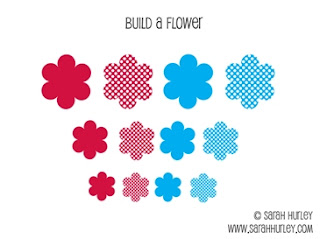
Build A Flower
Yesterday I finally got round to having my first play with the Expression 2 - wow! I can't wait to learn all the ins and outs of this machine because from the basic few things I done yesterday, amazing! I love the cute cartridges that come built in as well, especially the Cosmo Cricket one, adorable! Expect lots of Cricut projects over the next few days :o)
Today I launched some new projects in my shop, one of which I have been asked for so much since I first demonstrated the flowers from my Woodland Whimsies CD on TV, so I have made these as a download in lots of different colourways including the plain and polka dot options.
You may remember this card I made with them during my demo, each layer was scrunched and distressed, layered together and fastened with a brad then I added some glossy accents to make dew drops. You can also mist with your spray inks, add glitter and buttons, so many things! They are a great way of getting the layered flower look if you don't have a die cutting machine.
And to mark the launch of the 'Build A Flower' downloads, I'm giving away one of the sets for free! This Red and Blue is the one I demo-ed and you can download by clicking here or on the picture below.
I'd love you to share what you make over on my Facebook page, leave a pic and your blog link if you have one!
You can get hold of the other sets in lots of colours here...
Have a great weekend!
Sarah x
Today I launched some new projects in my shop, one of which I have been asked for so much since I first demonstrated the flowers from my Woodland Whimsies CD on TV, so I have made these as a download in lots of different colourways including the plain and polka dot options.
You may remember this card I made with them during my demo, each layer was scrunched and distressed, layered together and fastened with a brad then I added some glossy accents to make dew drops. You can also mist with your spray inks, add glitter and buttons, so many things! They are a great way of getting the layered flower look if you don't have a die cutting machine.
And to mark the launch of the 'Build A Flower' downloads, I'm giving away one of the sets for free! This Red and Blue is the one I demo-ed and you can download by clicking here or on the picture below.
I'd love you to share what you make over on my Facebook page, leave a pic and your blog link if you have one!
You can get hold of the other sets in lots of colours here...
Have a great weekend!
Sarah x
Subscribe to:
Posts (Atom)